Tips for Easy and Fast Lash Isolation
In the world of lash extensions, we all know that isolation is the cornerstone of flawless lash extensions. Isolation isn't just about separating lashes, it's the foundation for beautiful, healthy sets that wow your clients. Without proper isolation, extensions can clump, irritate, and even damage natural lashes – not exactly the recipe for happy clients.
But did you fully grasp the concept of isolation? Don’t miss out, as in this blog, we will dive deep into isolation, from the why to the how-to, and even explore some cool tricks to elevate your isolation process.
The Importance of Lash Isolation
We all know the struggle of creating a perfect lash set. You've got your premium lash trays, your lightning-fast application speed, but sometimes, something just feels...off. Clients might complain of discomfort, or worse, you see premature shedding. The culprit? Often, it boils down to one crucial step: isolation.
Isolation isn't just about separating lashes – it's the silent hero behind stunning, healthy lash sets. Here's why:
1. Science of Lash Growth: The Magic Behind Isolation
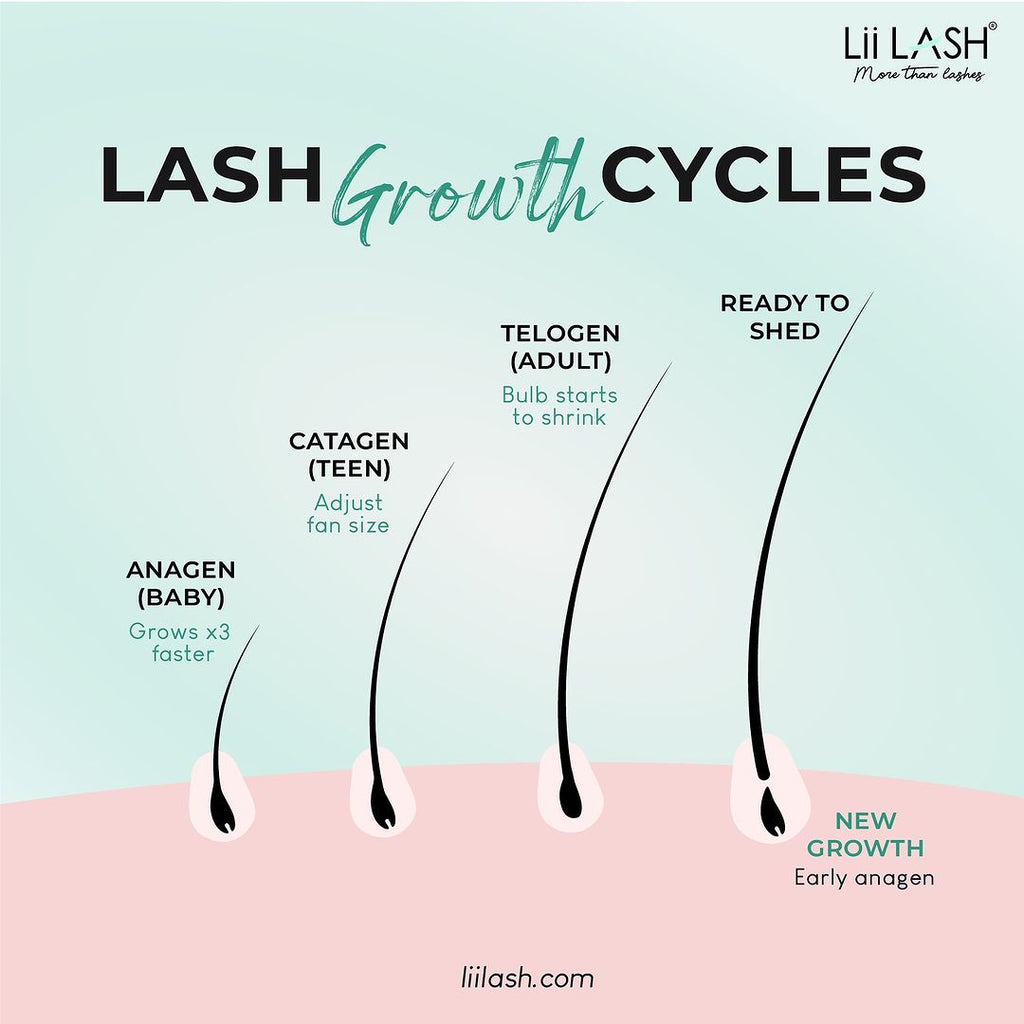
Before we tackle isolation techniques, it's crucial to understand the natural lash growth cycle – the foundation where extensions attach. Our natural lashes, just like hair, follow a growth cycle consisting of 3 phases:
- Anagen (Growth Phase): This is where the lash actively grows for a period of 2-7 weeks.
- Catagen (Transition Phase): This short phase lasts a few weeks and signals the end of the growth cycle.
- Telogen (Resting Phase): The lash eventually detaches from the follicle and naturally sheds during this phase, which lasts about 2-4 weeks.

Here's where isolation comes in: When you properly isolate a natural lash before attaching an extension, you're ensuring the adhesive bonds only to the mature lash in the anagen phase. This allows the natural lash to complete its growth cycle undisturbed.

Picture: Beauty Rule
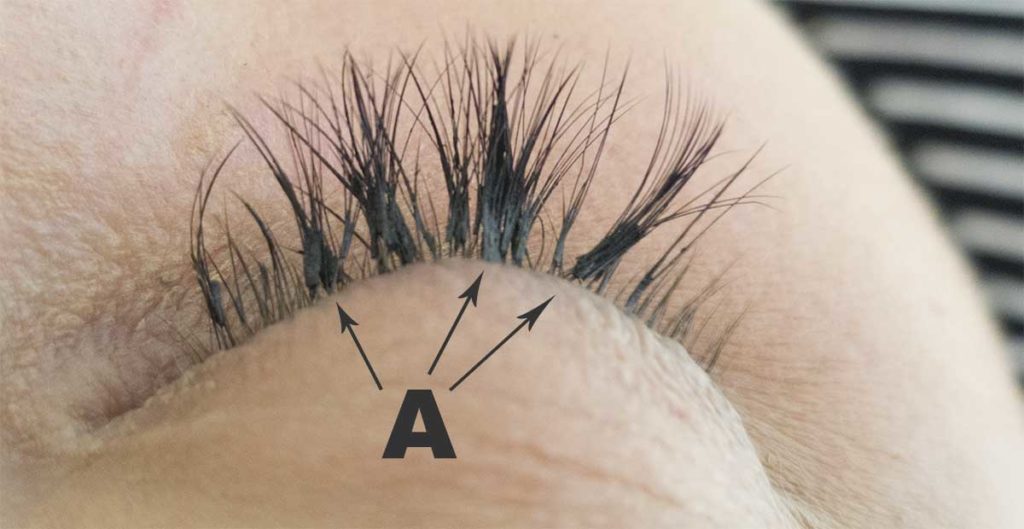
Poor isolation, on the other hand, can lead to extensions being glued to immature lashes or even multiple lashes stuck together. This disrupts the natural shedding process, causing:
- Premature Shedding: Immature lashes aren't strong enough to support the weight of the extension, leading to both the extension and the natural lash falling out prematurely.
- Damage to Follicles: When multiple lashes are clumped together and pulled on, it can strain the delicate follicles, potentially leading to damage and hindering future lash growth.

2. Benefits of Proper Lash Isolation
Mastering isolation techniques translates into a plethora of benefits, both for your clients and your lash business:
Better Retention
Proper isolation creates a strong, individual bond between the extension and the mature lash. This translates to longer-lasting wear, minimizing premature shedding and keeping your clients coming back for fills, not replacements.
Lash Health is King
Remember, healthy natural lashes are the foundation for stunning lash sets. Isolation prevents irritation and potential infections by ensuring a gentle, targeted application; hence, keeping your clients' lashes healthy. Healthy lashes are happy lashes, and happy lashes mean happy clients!
Comfort is Key
Imagine having heavy, tangled lashes stuck together. Every blink would be a struggle, with lashes catching on each other, creating an uncomfortable feeling of constant friction. A terrible scenerio that nobody wants! Thankfully, proper lash extension isolation prevents this eyelash nightmare! Isolation ensures a lightweight, comfortable feel for your clients. They'll be thanking you for lash sets they can forget they're even wearing.
3. Consequences of Poor Isolation
Skipping isolation might seem like a time-saver, but it can lead to a cascade of problems for your clients and their lashes:
- Clumping: This is the most obvious consequence. When you don't isolate, you risk gluing multiple lashes together, creating an unnatural, clumpy look. This can weigh down the natural lashes, causing discomfort and premature shedding.

- Irritation and Infection: Clumping can trap dirt and bacteria, leading to eye irritation and even infections.

- Premature Shedding: As mentioned earlier, extensions glued to immature lashes or multiple lashes clumped together will eventually fall out prematurely, taking healthy natural lashes with them. This can damage the lash follicles and disrupt the natural growth cycle.

Lash Isolation Techniques: Mastering the Art of Separation
Now that we've established isolation as the foundation for flawless lashes, let's dive into the techniques themselves!
1. A Step-by-Step Guide
Before we begin attaching extensions, proper preparation is key. Here's a breakdown of essential steps for optimal isolation:
Eye Prep:
- Cleanse: Gently cleanse the client's lashes with a lash shampoo specifically formulated for extensions. This removes any makeup, oils, or debris that could hinder adhesion.
- Under Eye Patch: Apply a lint-free under-eye patch to shield the lower lashes and create a clean working area.
Lash Separation: Gently brush the natural lashes and lash extensions upwards with a lash comb to separate them and reveal individual lashes for easier isolation.
Isolation:
- Target Lash: Identify a single, isolated natural lash in the anagen phase (typically thicker and darker at the base). With your isolation tweezers, gently grasp the base of the natural lash about 2-3mm away from the eyelid. Avoid pinching the actual lash hair, focus on the base.
- Push and Separate: Gently push and separate neighboring lashes away from the isolated lash you plan to attach the extension to.
Application: Use your pick-up tweezers to pick up the extensions and dip them into the adhesive. Carefully place the extension onto the isolated natural lash. Ensure you do not place it too close or too far from the natural lash base; the ideal distance is 0.5-1mm from the skin.
Hold it in place for a moment to allow the adhesive to dry and form a secure bond with the clients's natural lash. Remember to hold your isolation tweezers with a relaxed grip for better control and precision.
2. Advanced Isolation Techniques
Lash In Layers: Lash layering is an advanced isolation technique that takes your lash artistry to the next level by creating a fuller, more voluminous look. Here's a breakdown of the method:
The Concept:
Instead of applying extensions directly to each natural lash, lash layering involves dividing the natural lashes into two (or sometimes three) layers and meticulously isolating lashes within each layer. This allows you to place extensions strategically, creating more depth and dimension in the final lash set.
Benefits:
- Dramatic Volume: Layering allows for more extensions to be applied safely, creating a visibly fuller and more dramatic effect compared to classic lash extensions.
- Textured Look: By placing extensions in different layers, you can create a textured, fluffy look that mimics natural lash growth.
- Enhanced Retention: Proper isolation within each layer ensures each extension adheres to a single, healthy natural lash, potentially improving retention.
The Technique:
1. Tape down both the upper and bottom lashes in two directions.
2. Use tweezers to carefully lift and reveal a layer of upper lashes from the bottom.
3. Once you have isolated a layer of lashes, apply the extensions as you normally would.
4. Proceed to the next layer. With the already-applied lashes, it's easier to push them aside and isolate the natural lashes for application.
For more information on how to do lash layering, check out our blog: Lash Layering Technique: For Beautiful Volume Lash Set
Besides, lash artistry isn't a one-size-fits-all approach. Mastering isolation for different lash types and advanced applications unlocks a whole new world of creativity:
Isolation for Different Lash Types:
- Straight Lashes: Use a slightly angled approach with your isolation tweezers to create a better grip and isolate the lashes for easier separation.
- Thin Lashes: Extreme care is needed. Opt for finer-tipped tweezers and avoid excessive pressure when isolating.
- Sparse Lashes: Work meticulously, isolating each available lash and strategically placing extensions to create a fuller appearance.
- Isolating for Volume: Isolate a single, strong natural lash
3. Troubleshooting Common Isolation Challenges
Even the most experienced lash artists encounter occasional hurdles. Here are some tips to tackle common isolation challenges:
Unruly or Crossed Lashes:
- Microfiber Swabs: Gently use a clean, dry microfiber swab to separate stubborn crossed lashes.
- Isolation in Sections: Work on smaller sections of lashes at a time to isolate unruly ones more effectively.
Minimizing Client Discomfort:
- Eye Patches: Ensure the under-eye patches are properly positioned to prevent any adhesive or lashes from touching the client's skin.
- Proper Lighting: Use good lighting to clearly see the lashes, minimizing the need to hold your tweezers too close to the client's eyes.
101 Tips for Easier Isolation
Isolation might be an art form, but having the right tools in your lash kit can definitely make it easier to achieve mastery.
1. Tweezers: Your Precision Partners
Tweezers are an extension of your hand in the world of lash artistry. Choosing the right ones can significantly impact your isolation efficiency and comfort. Here's a breakdown of popular types:
Curved Tweezers
The MVP of isolation! This is the most common choice for its versatility. The bended tip allows for a clear view of the lash base and easier grasping without accidentally pinching the lash hair itself.
As the name suggests, these tweezers have a slight curve that allows for a more natural approach to isolation, especially when working on curved or hooded eyelids.
Straight Tweezers
These offer more control when picking up extensions or separating stubborn, crossed lashes. They can also be helpful for applying classic lashes in a straight-on direction.
Pointed Tweezers
These have an ultra-fine tip, ideal for isolating very thin or sparse lashes with minimal pressure. However, they require a high level of precision and may not be suitable for beginners.
Y-Tweezers
These ingenious tweezers feature a Y-shaped design with two prongs at the tip. One prong can be used to isolate the lash, while the other gently holds neighboring lashes apart, freeing up your other hand for picking up the extension.
2. Lash Tapes: Creating a Clean Canvas
Lash tapes are your secret weapon for creating a clean working area and maximizing isolation effectiveness:
- Lower Lash Control: Lash tapes gently adhere to the lower eyelid, holding down the client's natural lower lashes and preventing them from interfering with the application process. This allows you to focus solely on isolating the upper lashes.
- Clean Working Area: Lash tapes create a barrier between the client's skin and your tools, minimizing the risk of adhesive or stray lashes touching the skin and causing discomfort.
Tape Types and Application
- Gel Tapes: These offer a comfortable and flexible hold, conforming easily to the client's eye shape. They come in various widths to suit different preferences.
- Micropore Tapes: These are a more breathable option, ideal for clients with sensitive skin. They might require a slightly firmer application to maintain adhesion.
- Application Tip: If you find the tape is too sticky, stick it onto your hands in advance so that it reduce the stickiness, prevent hard-removal and causing pain for your clients when removing tape.
Conclusion
Lash extension isolation might seem like a simple concept, but mastering it is the foundation for creating stunning, healthy, and long-lasting lash sets. By understanding the science behind isolation, the benefits it offers, and the techniques to achieve it flawlessly, you'll be well on your way to becoming a lash boss!
Remember, this blog is just the beginning of your isolation journey. We encourage you to explore further, experiment with different tools and techniques, and refine your skills. With dedication and practice, you'll be isolating lashes like a pro in no time!
So, lash artists, keep those tweezers sharp, embrace the power of isolation, and get ready to create lash magic on every client!


