How to Get Perfect Lash Extension Placement
Hey there, lash lovers! We know the magic of a beautiful lash set can transform your client's eyes and boost their confidence. But achieving that flawless, natural look hinges on one crucial factor: precise lash extension placement.
While high-quality lash extensions are essential, even the best products won't shine without proper application. In this blog, we'll delve into the art of lash placement, equipping you with the knowledge and techniques to create stunning, long-lasting lash sets. Whether you're a lash newbie or looking to refine your skills, get ready to elevate your lash game!
Discovering the core knowledge of Lash Placement
Natural Lash Anatomy 101
Before we dive into placement techniques, let's understand the 'canvas' you're working with: the natural lash.
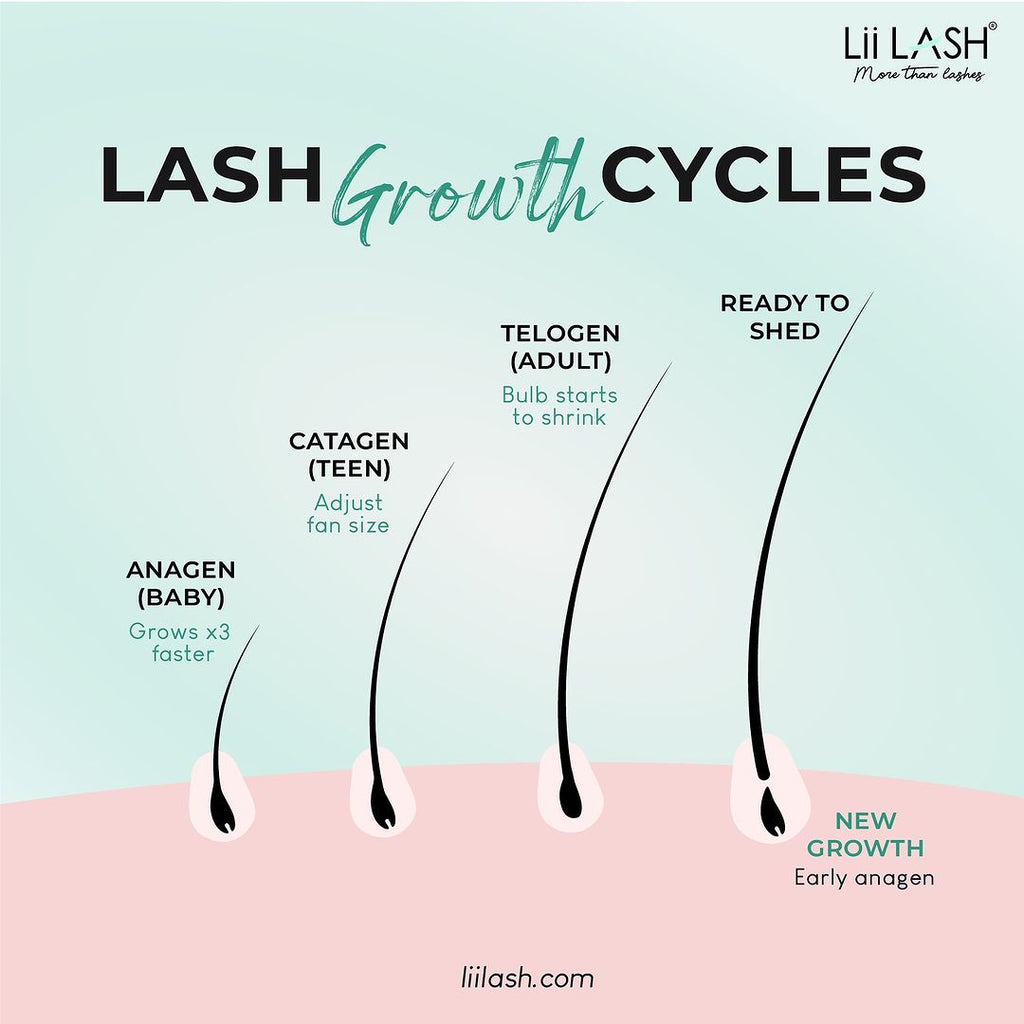
Your client's natural lashes go through a growth cycle just like hair on your head. Understanding these stages will give you a basic knowledge of why lash placement is important.
- Anagen: This is the active growth phase, lasting 30-45 days. It's ideal to avoid placing extensions on very new lashes to avoid damage.
- Catagen: A short transitional phase lasting a couple of weeks.
- Telogen: The resting phase where lashes naturally shed. You can safely attach extensions to lashes in this stage.
Knowing the lash growth cycle helps you choose extensions that won't weigh down new lashes and ensures a comfortable, long-lasting wear for your client.
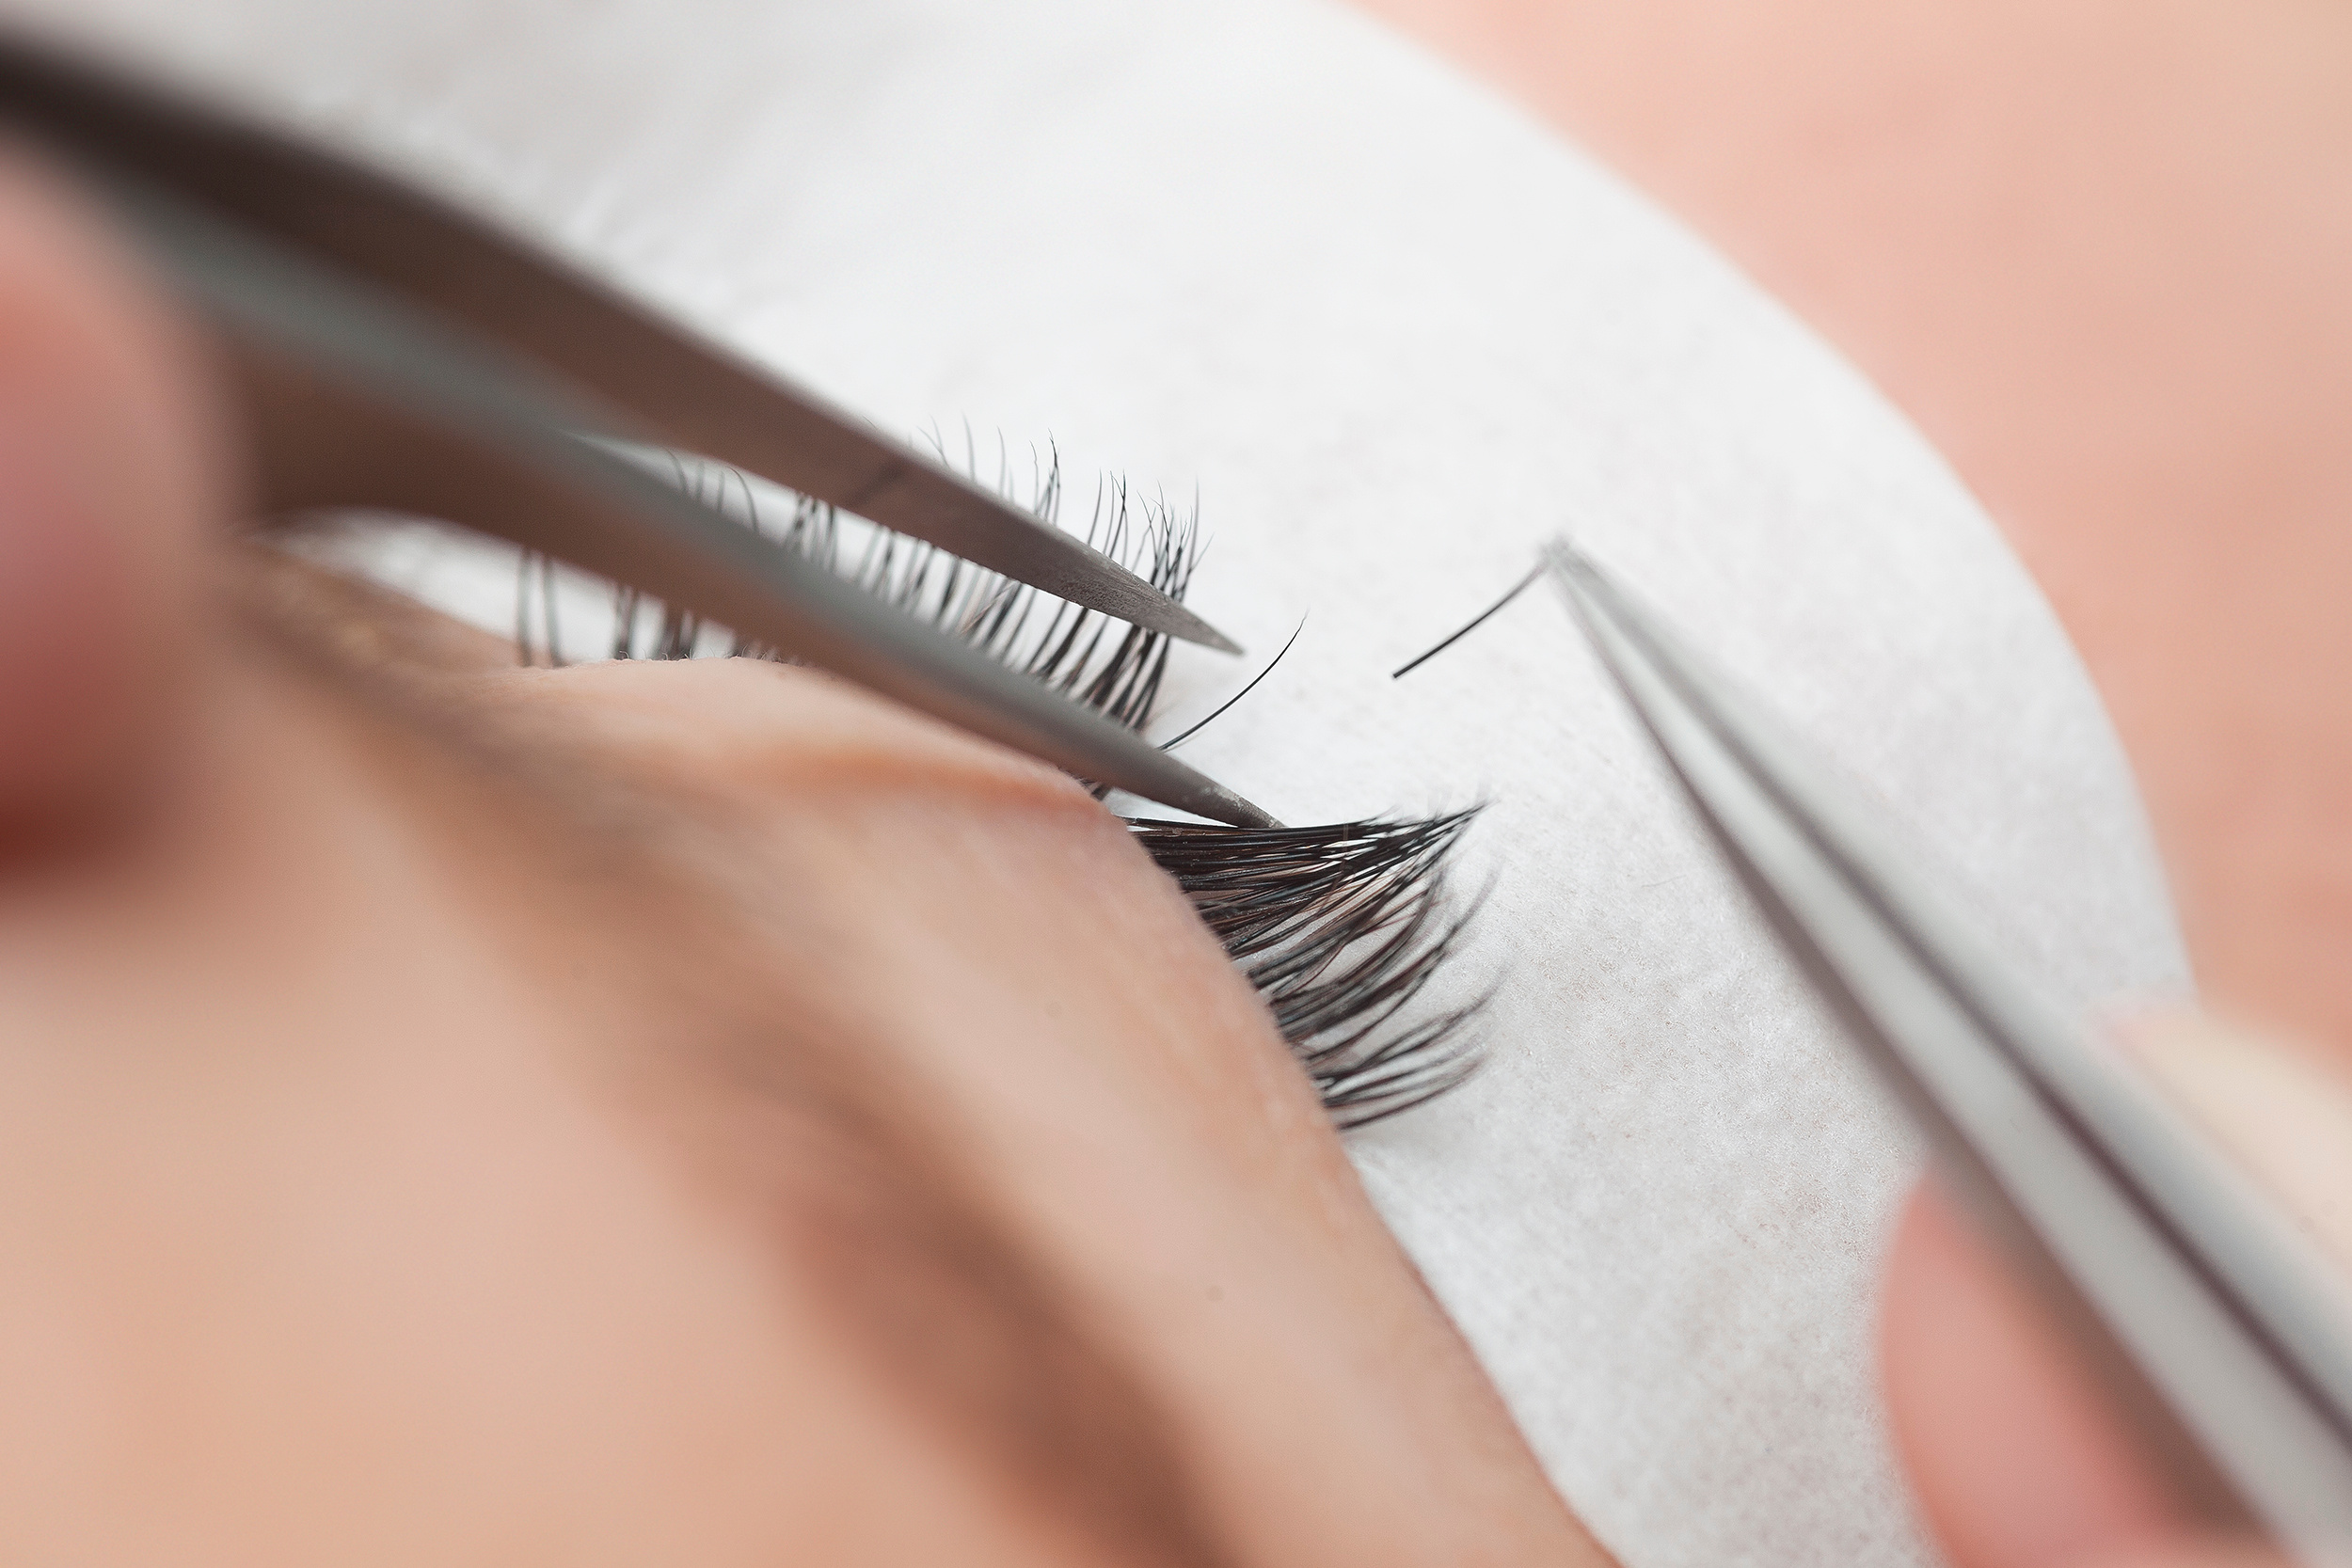
Isolation Lashes Before Placing Matters
Before applying an extension, you need to isolate natural lashes. This step simply means separating a single natural lash from its neighbors for attachment. They are the foundation for flawless placement and here's why:
- Prevents Clumping: Applying extensions to multiple lashes at once creates an unnatural, clumpy look. Proper isolation ensures each lash gets its own extension, resulting in a natural, fanned-out effect.
- Maximizes Retention: Clumps put extra weight on natural lashes, causing them to break or shed prematurely. Isolation helps extensions bond securely to individual lashes for better retention.
There are various isolation techniques, and mastering them will become second nature with practice.
The Art of Lash Placement
Now that we've explored the importance of natural lash anatomy and isolation, let's get down to the artistry of lash placement! Here are some essential techniques to master:
The 90-Degree Rule
This golden rule ensures comfortable wear and optimal lash health. Imagine a perfect right angle – that's the ideal position for the lash extension base to meet the natural lash. Avoid placing extensions flat on the lash, as this can cause irritation and hinder natural growth.
Placing Distance from the Lash Line
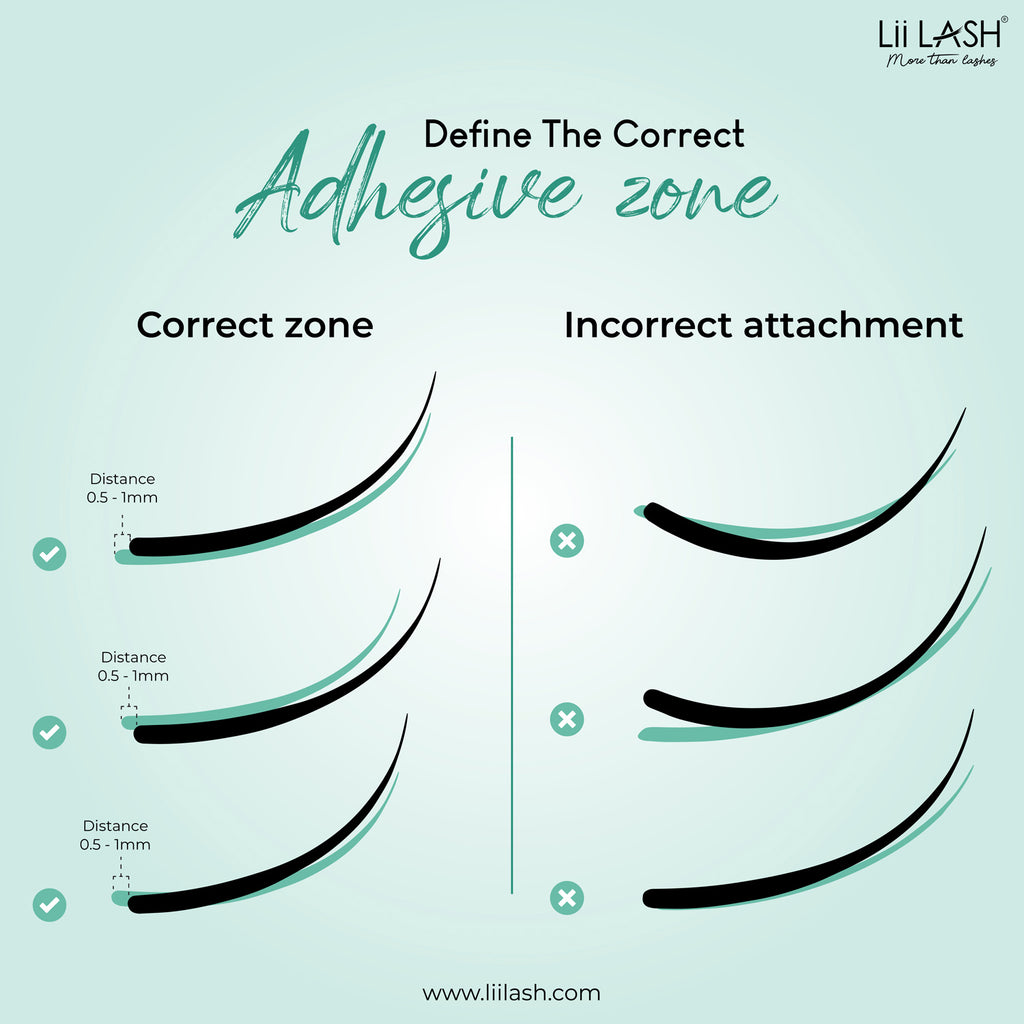
There's a sweet spot for placement that balances comfort and aesthetics. Aim to attach the extension base slightly above the natural lash line (around 0.5-1mm) for optimal comfort, hygiene, and good retention. Avoid placing extensions too far or too close from the lash line as this can lead to a number of unpleasant consequences:
If you place it too close:
- Constant Contact: Lashes that touch the eyelid can be incredibly irritating, causing discomfort and potentially hindering tear production.
- Skin Irritation: The adhesive can seep onto the skin, causing allergic reactions or redness.
- Retention Issues: Even a slight touch with the skin can compromise the bond between the extension and the natural lash, leading to premature shedding.
If you place it too far:
While you might think placing extensions farther away would ensure better retention, it actually has the opposite effect:
- Weak Bond: The adhesive needs a surface to properly bond to. When extensions are placed too far from the natural lash, the connection becomes weak, increasing the risk of fallouts.
- Unnatural Look: Lashes placed too far away create a gap between the extension base and the natural lash line, resulting in an unnatural appearance.
Placement Position
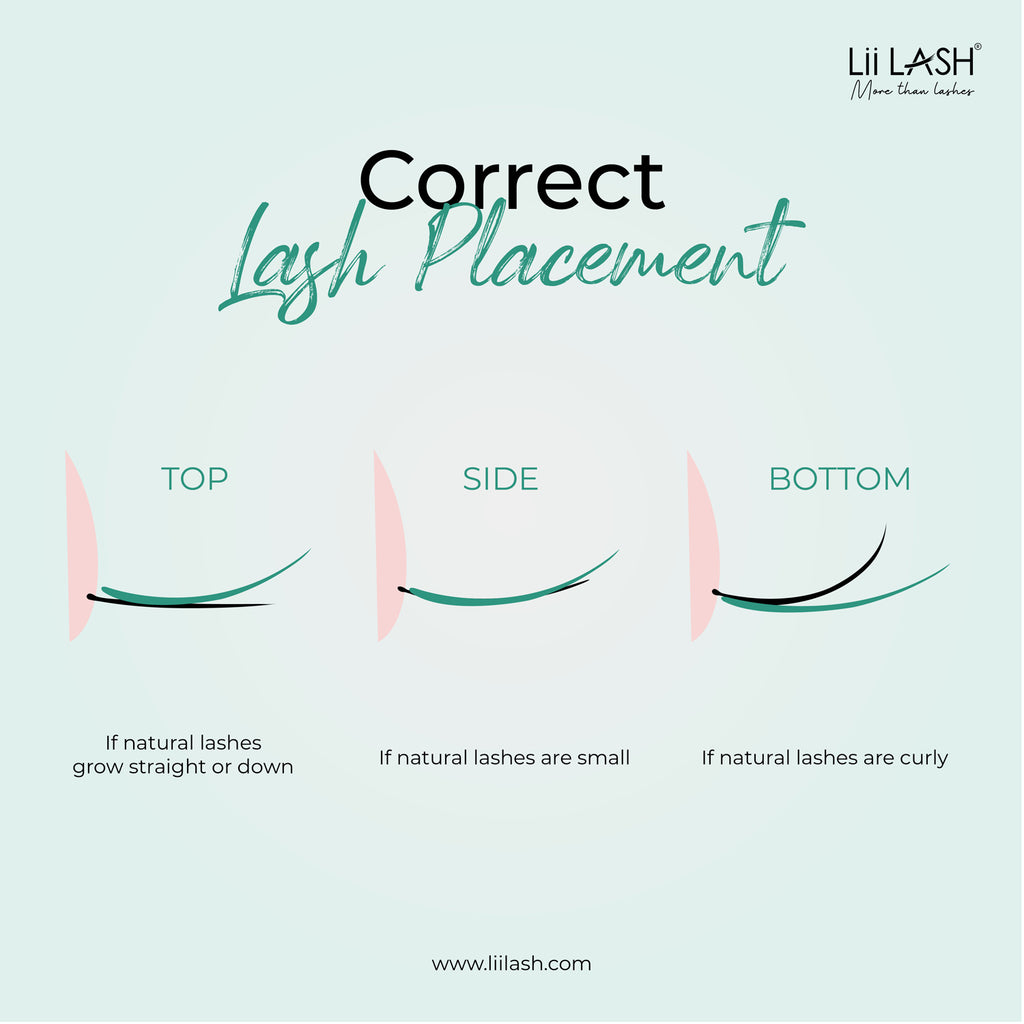
1. Top Position: The Classic Choice
This is the most popular placement method, ideal for straight or downward-growing natural lashes. Extensions are attached directly on top of the natural lash, mimicking its natural growth direction. This position offers:
- Strong Bond: Maximum surface area for the adhesive to create a secure bond between the extension and the natural lash.
- Natural Look: Creates a seamless extension of the natural lashes for a realistic appearance.
2. Bottom Position: For Upward-Curving Lashes
The second most popular position, this method is perfect for clients with naturally curly or upward-pointing lashes. Here, extensions are placed underneath the natural lash, with the base adhering to the underside of the natural lash near its base. This positioning helps to:
- Control Curl: Flattens out or neutralizes the upward curl of natural lashes for a more balanced, open-eyed appearance.
- Enhanced Comfort: Reduces the chance of extensions brushing against the eyelid, ensuring a comfortable wear.
3. Side Position: Filling the Gaps
This placement technique comes in handy when dealing with clients who have:
- Sparse Natural Lashes: By attaching extensions slightly to the side of the natural lash, you can create a fuller lash line even with fewer natural lashes present.
- Thin Natural Lashes: Placing extensions slightly to the side helps distribute weight more evenly, minimizing stress on delicate natural lashes.
Extra Tips
Remember: No matter the position you choose, always ensure sufficient bonding surface and parallel placement. This means the base of the extension should have enough contact with the natural lash for a strong bond and it needs to be parallel to the base of the natural lash for optimal retention and to avoid creating unwanted gaps.
Focus on precise application rather than speed. 10 perfectly placed lashes will last significantly longer than 50 lashes with lifted bases.
Avoid Lifted Bases:
Lifted bases (where the extension doesn't sit flat against the natural lash) compromise retention and create unsightly gaps. These gaps can trap dirt and oils, potentially leading to irritation or infection. Always remove and reapply any extension with a lifted base.

Here are some extra tips for a perfect placement position:
- Look from the side: Hover the extension over the natural lash and adjust the angle so the base sits flush with the natural lash. Use tweezers to gently guide the extension into place, ensuring it follows the natural curve of the lash.
- Slow and Steady: Gently bring the extension towards the natural lash, maintaining a perfect angle for placement. For a seamless, natural look, each extension should mimic the natural growth direction of the individual lash it's attached to.
Advanced Placement Techniques
Feeling confident with the basics? Let's explore some advanced techniques to add to your lash artistry toolbox:
For Short Lashes and Gaps
Not all clients have perfectly even lash lines and handling them require special skills
- Short Lashes: Choose ultra-fine lash extensions that won't overwhelm baby lashes. Be extra gentle with placement to avoid damage.
- Gaps: Strategically place shorter extensions in sparse areas to create a fuller lash line without compromising natural lash health.
Layering Techniques
Take your lash sets to the next level with layering. This involves carefully placing multiple extensions of varying lengths on top of each other to create dramatic volume while maintaining a natural look. Remember, proper isolation remains key when layering to avoid clumping and discomfort.
Maximizing Retention with Precision
Although placement is key, but it's not the whole story! There are additional factors contributing to achieving flawless results that you should take into careful consideration:
Lighting and Magnification
Good lighting and magnification are your best friends for precise placement. Invest in a well-lit workspace with a magnifying lamp to ensure you can see every detail of the lash line. This way you can increase precision and reduce fatique for your eyes.
Adhesive Type
The type and viscosity of your adhesive can influence placement. While we won't delve deep into retention here, remember that a good-quality adhesive with the right viscosity will allow for smooth application and proper bonding at the ideal distance from the lash line.
Practice With Sponges or Mannequins!
Don't underestimate the power of practice! Even the best lash techs encounter occasional placement mishaps. Before working on clients, experiment with lash sponges or mannequins to refine your isolation and placement techniques. The more you practice, the more confident and precise you'll become.
Conclusion
Mastering lash extension placement takes dedication and practice, but the rewards are endless. By understanding natural lashes, applying isolation techniques, and following these placement principles, you'll be well on your way to creating stunning, long-lasting lash sets that leave your clients feeling confident and beautiful.
Remember, practice, precision, and high-quality products are the keys to creating stunning lash sets that wow!